 | Securing the SSH connection to Klipper-based 3d printers |
Find printer IP address
TBD
Opening a terminal on a Windows computer
There are two common options, the command prompt and Git Bash. The choice depends on how frequenctly you expect to use the command line and how frequenctly you use Linux.
Opening a Windows Command Prompt in Windows Terminal
- Open the Windows Terminal
- Type terminal in the Windows search bar and press ENTER
- Click on the downward arrow Open a new tab symbol
 and select Command Prompt
Opening a Git Bash Prompt in Windows Terminal
- Install Git for Windows
- Download the latest version of Git for Windows from https://git-scm.com/downloads/win
- Double-click the installer to start the installation process
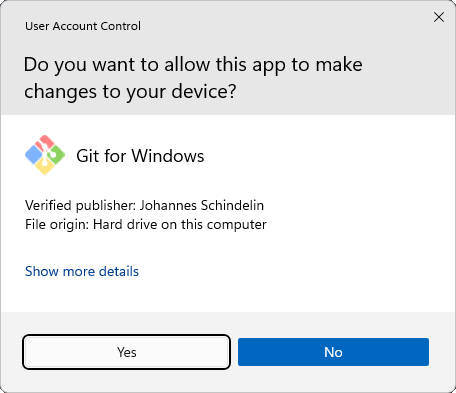
- Click Yes if the User Account Control dialog appears
- Complete the Information screen
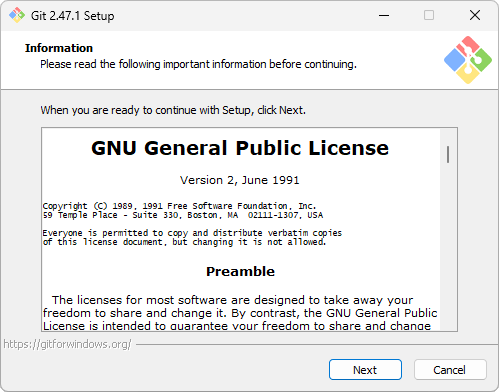
- Click Next
- Complete the Select Destination Location screen
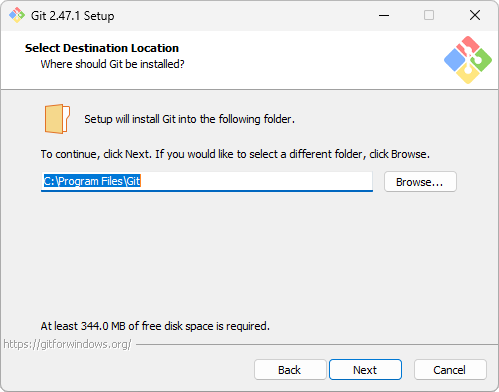
- Click Next
- Complete the Select Components screen
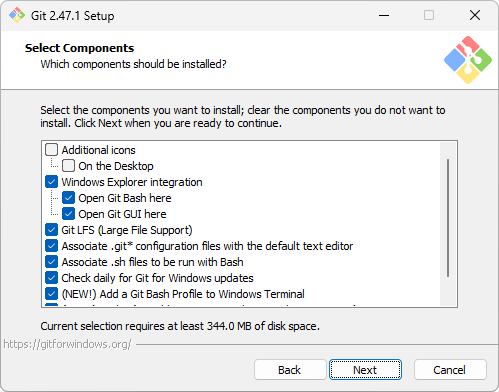
- (Optional) Uncheck Windows Explorer Integration if you don't want Git-related options in your Windows context menus.
- Check Check daily for Git for Windows updates
- Check (NEW!) Add a Git Bash Profile to Windows Terminal
- Click Next
- Complete the Select Start Menu Folder screen
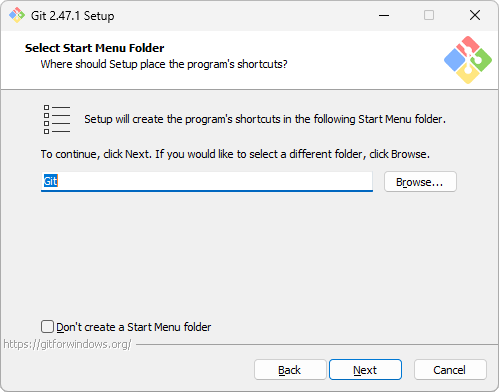
- Click Next
- Complete the Choosing the default editor used by Git screen
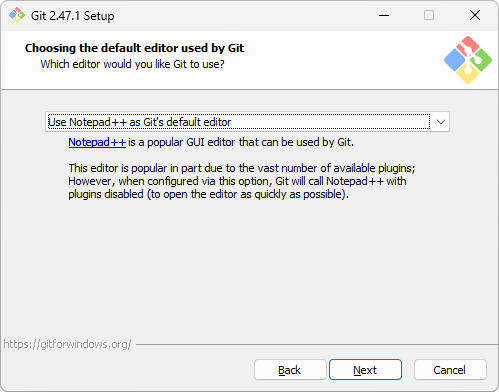
- Choose your favorite text editor (select Use nano as Git's default editor if you are unsure)
- Click Next
- Complete the Adjusting the name of the initial branch in new repositories screen
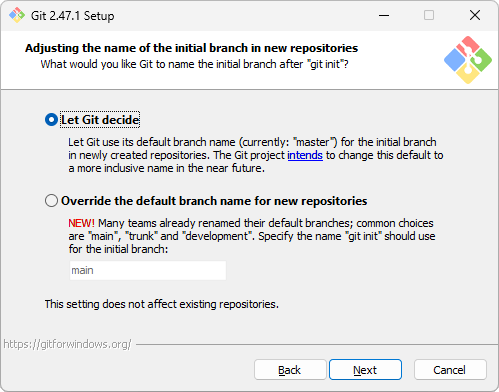
- Click Next
- Complete the Adjusting your PATH environment screen
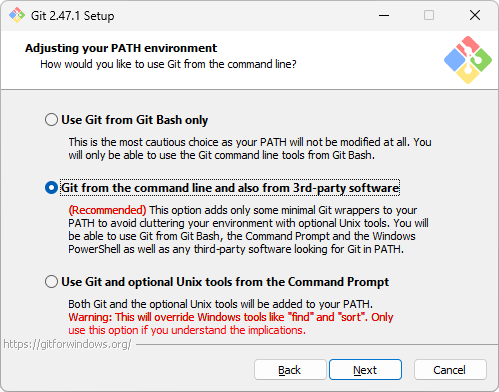
- Click Next
- Complete the Choosing the SSH executable screen
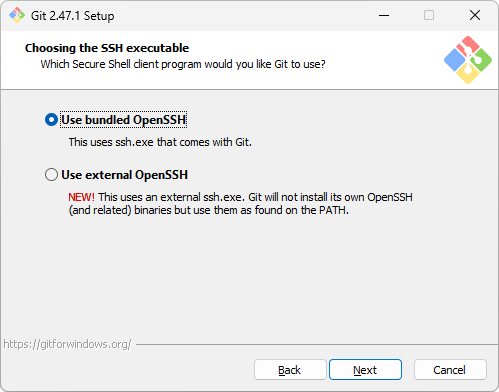
- Click Next
- Complete the Choosing HTTPS transport backend screen
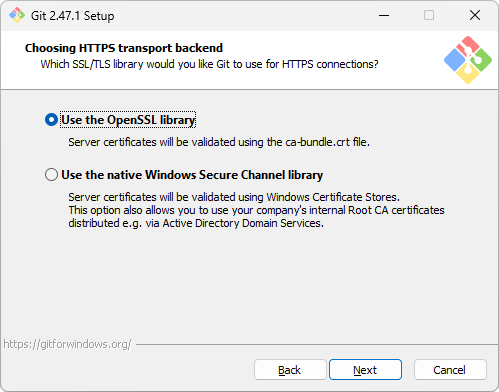
- Click Next
- Complete the Configuring the line ending conversions screen
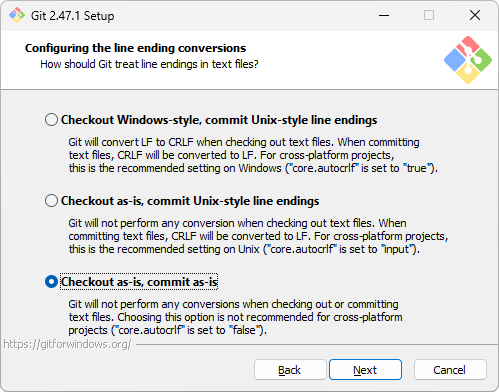
- Select Checkout as-is, commit as-is
- Click Next
- Complete the Configuring the terminal emulator to use with Git Bash screen
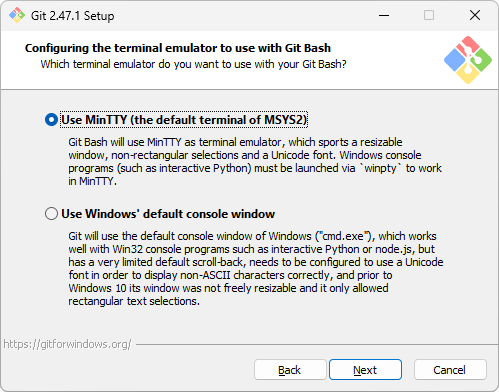
- Click Next
- Complete the Choose The Default Behavior of `git pull` screen
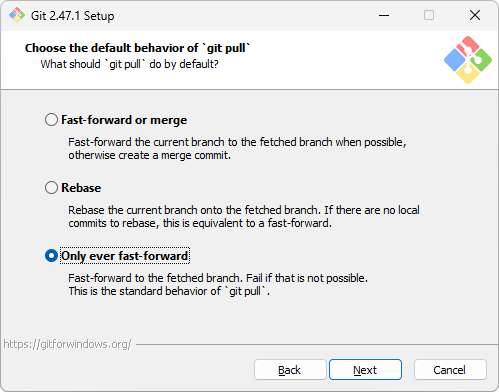
- Select Only ever fast-forward
- Click Next
- Complete the Choose a credential helper screen
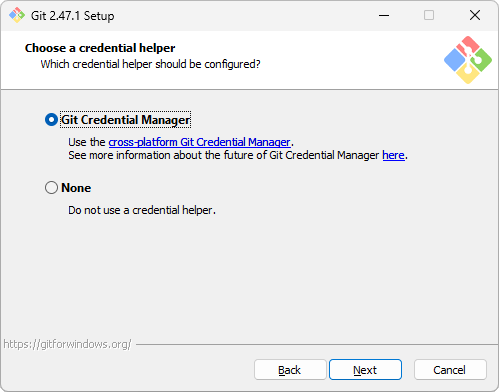
- Click Next
- Complete the Configuring extra options screen
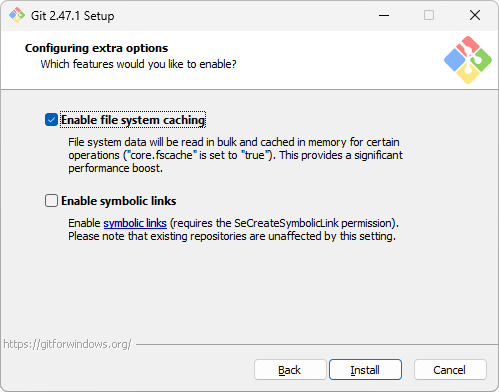
- Click Install
- Complete the Completing the Git Setup Wizard screen
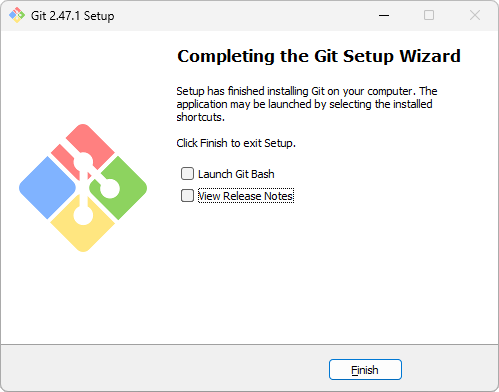
- Uncheck View Release Notes
- Click Finish
- Open the Windows Terminal
- Type terminal in the Windows search bar and press ENTER
- (Optional) Make Git Bash the default profile
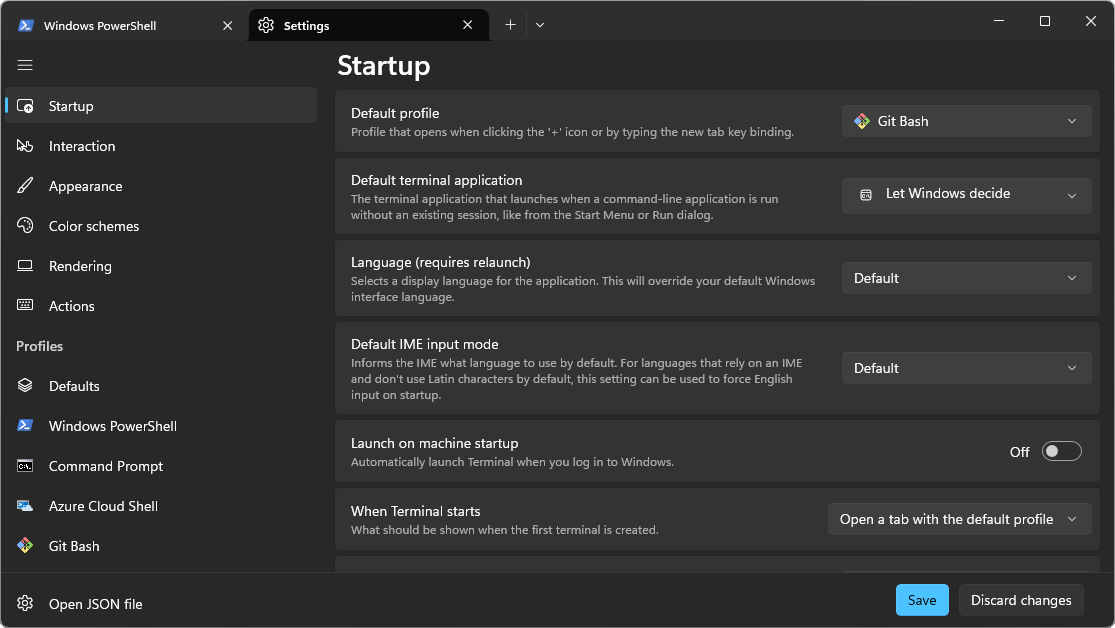
- Click on the downward arrow Open a new tab symbol
 and select Settings
- Set the Default profile field to Git Bash
- Click Save
- Close the current tab
- Click on the downward arrow Open a new tab symbol
 and select Git Bash
Connecting to the printer with a password
The default login credentials for the Neptune 4 Max (and other Makerbase-based mainboards) is:
Username: mks
Password: makerbase
- Open a Command Prompt or Git Bash terminal if one isn't already open
- Launch SSH
Replace <PRINTER_USER_NAME> with the printer's user name and <PRINTER_IP_ADDRESS> with the printer's IP address.
ssh <PRINTER_USER_NAME>@<PRINTER_IP_ADDRESS>
- Enter yes at the prompt asking if you would like to continue
- Enter the password
Changing the password
Even if you are planning on disabling the use of passwords to SSH into your printer, it is still important to change your password.
Once you are logged into the printer, the password will still be used to gain "super user privileges". If you don't change the password,
then it will be very easily for a hacker to gain root privileges if they ever get into the printer.
Be very careful while changing the printer's password. To prevent any compatibility issues, only use printable ASCII characters when entering new passwords.
Additionally, ensure you keep a copy of the password in a safe place since if you forget it, you might get locked out of your printer.

https://upload.wikimedia.org/wikipedia/commons/1/1b/ASCII-Table-wide.svg
By default, the system tests new passwords to verify they exceed a complixity threshold. If your password is rejected for being too simple, try again with a more complex password.
- SSH into the printer if not already connected
- Launch the change user password program
passwd
- Enter the current password
- Enter the desired new password
- Re-enter the new password
To close the SSH connection, you can press CTRL-D, use the exit command, or simply close the window.
Using an SSH key
- Using Bash (e.g., Git Bash)
- Create an SSH key
This step is performed on a computer or laptop.
- Open a Command or Bash prompt
- Ensure the .ssh directory exists
The -p option prevents a warning if the directory already exists.
mkdir -p ~/.ssh

- Create the SSH key
Replace <EMAIL_ADDRESS> with your email address. While your email is associated with the SSH key, you will not
receive any emails and your email will not be sent to any third-parties.
ssh-keygen -t ed25519 -C <EMAIL_ADDRESS>
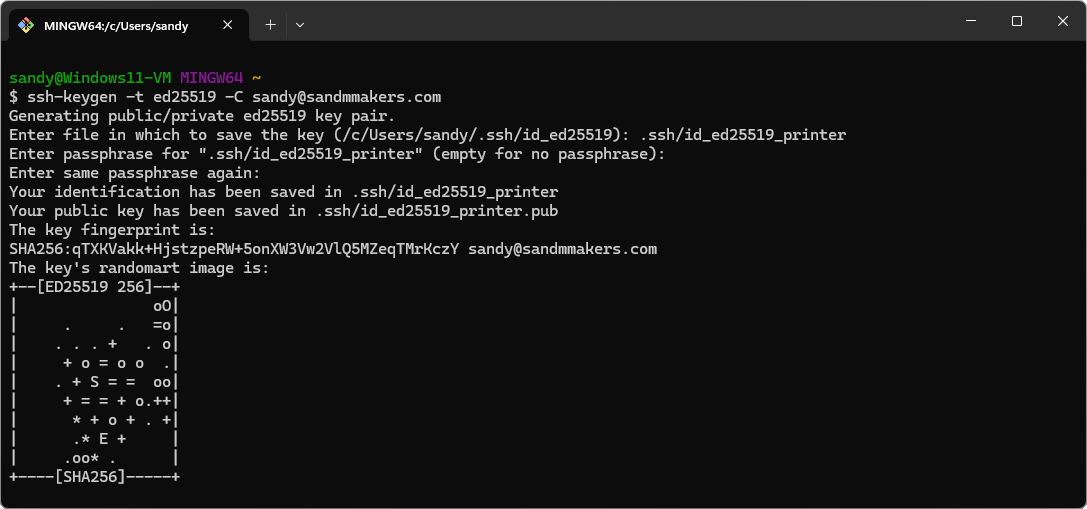
- Set the Enter file in which to save the key field to .ssh/id_ed25519_printer
Just like with passwords, it is often considered safer to have a separate key for each service or device that you use. We changed the SSH key's name to help distinguish it from any existing keys you might have or might create in the future.
- Leave the Enter passphrase field empty
Say why no passphrase and how the private keey must be protected like a password.
- Leave the Enter same passphrase again field empty
The above steps created two files ~/.ssh/id_ed25519_printer and ~/.ssh/id_ed25519_printer.pub. These are the private and public SSH keys, respectively.
Protect the private key as you would any important password.
- Install the public SSH key
- Install the SSH public key on the printer, entering the printer's password when prompted
ssh-copy-id -i ~/.ssh/id_ed25519_printer <PRINTER_USER_NAME>@<PRINTER_IP_ADDRESS>

- Test logging into the printer using the SSH key
ssh -i ~/.ssh/id_ed25519_printer <PRINTER_USER_NAME>@<PRINTER_IP_ADDRESS>
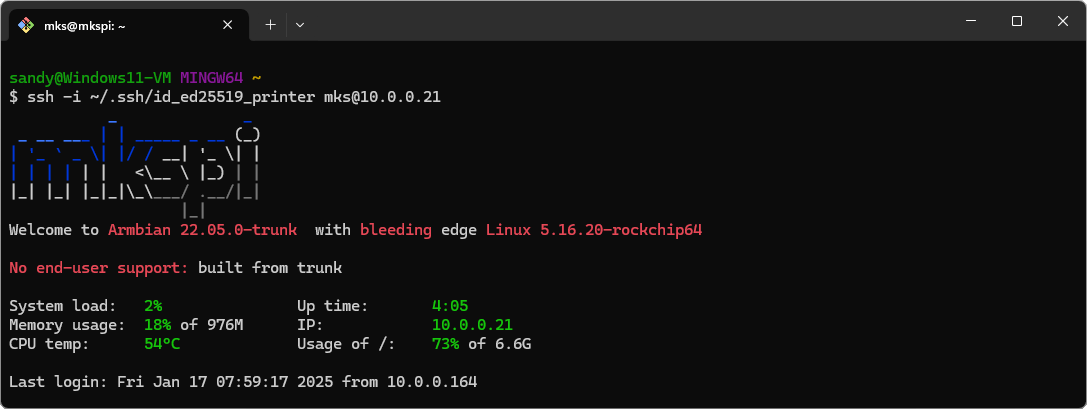
If you are prompted for a password, then the installation failed.
- Using the Windows Command Prompt
TBD
Disable password authentication
SSH keys are significantly stronger and more difficult to crack than guessing passwords. To improve printer safety, password authentication can
be disabled, eliminating the possibility an attacker correctly guesses your password. Additionally, you will no longer need to enter a password
when using SSH to log into the printer, you may still need to use the password however anytime you need to perform anything as root (e.g., when
using sudo).
- SSH into the printer using the previous created SSH key
- Backup the original /etc/ssh/sshd_config file
Backing up (system-provided) files prior to editing them is a good practice and should be followed any time it is reasonably possible.
sudo cp /etc/ssh/sshd_config /etc/ssh/sshd_config.orig
- Create a temporary copy of the /etc/ssh/sshd_config file for editing
sudo cp /etc/ssh/sshd_config /etc/ssh/sshd_config.disabled
- Open the temporary file /etc/ssh/sshd_config.disabled for editing as root
Be very careful while editing /etc/ssh/sshd_config.disabled. While the file will be tested for errors prior to being used,
there is still a small potential to break SSH connections.
sudo nano /etc/ssh/sshd_config.disabled
- Disable root logins by replacing the line:
#PermitRootLogin prohibit-password
with
PermitRootLogin no
- Enable public key authentication by uncommenting the line:
Uncommenting means removing any # characters at the begining of the line.
While public key authentication is enabled by default, it can't hurt to explicitly enable it, just in case the default ever changes.
#PubkeyAuthentication yes
- Disable password-based logins by replacing the line:
#PasswordAuthentication yes
with
PasswordAuthentication no
- Ensure KbdInteractiveAuthentication is disabled by verifying the field KbdInteractiveAuthentication is set to no
- Disable PAM authentication by replacing the line:
UsePAM yes
with
UsePAM no
- Ensure challenge response authentication is disabled by appending the following line to the end of the file:
ChallengeResponseAuthentication no
- Save and exit nano
CTRL-X
- Test the sshd configuration
This command will generate a log of output, but there should be no error or warning messages.
sudo sshd -T -f /etc/ssh/sshd_config.disabled
- Verify the settings are correct
NOTE: If there are any errors or the values are not as expected, double check your changes. Also, look for files in /etc/ssh/sshd_config.d, since they could also be setting values.
- Test root logins are disabled
sudo sshd -T -f /etc/ssh/sshd_config.disabled | grep permitrootlogin
this should output
permitrootlogin no
- Test that public key authentication is enabled
sudo sshd -T -f /etc/ssh/sshd_config.disabled | grep pubkeyauthentication
this should output
pubkeyauthentication yes
- Test that password authentication is disabled
sudo sshd -T -f /etc/ssh/sshd_config.disabled | grep passwordauthentication
this should output
passwordauthentication no
- Test that KbdInteractive authentication is disabled
sudo sshd -T -f /etc/ssh/sshd_config.disabled | grep kbdinteractiveauthentication
this should output
kbdinteractiveauthentication no
- Test that PAM has been disabled
sudo sshd -T -f /etc/ssh/sshd_config.disabled | grep usepam
this should output
usepam no
- Test that Challenge Response authentication is disabled
sudo sshd -T -f /etc/ssh/sshd_config.disabled | grep challengeresponseauthentication
this should return nothing or
challengeresponseauthentication no
- Replace the SSHD configuration with with the temporary copy
sudo mv /etc/ssh/sshd_config.disabled /etc/ssh/sshd_config
- Restart sshd for the changes to take effect
sudo systemctl restart ssh
- Verify password logins are now disabled
ssh <USER>@<PRINTER_IP_ADDRESS>
You should get an error message of:
"mks@10.0.0.21: Permission denied (publickey)."
Create an alias
The foillowing commands are performed on the computer, not the printer/remote computer.
- Open or create the file ~/.ssh/config
nano ~/.ssh/config
- Add the following to the file:
Host <DESIRED_ALIAS>
User <PRINTER_USER_NAME>
HostName <PRINTER_IP_ADDRESS>
PreferredAuthentications publickey
IdentityFile ~/.ssh/id_ed25519_printer
- Verify the alias
ssh <ALIAS>
Connecting to the printer with the USB-C serial port
These directions describe how to connect to a Neptune 4 series printer using the USB-C virtual serial port. Using the virtual serial port is a fail-safe in case SSH stops working.
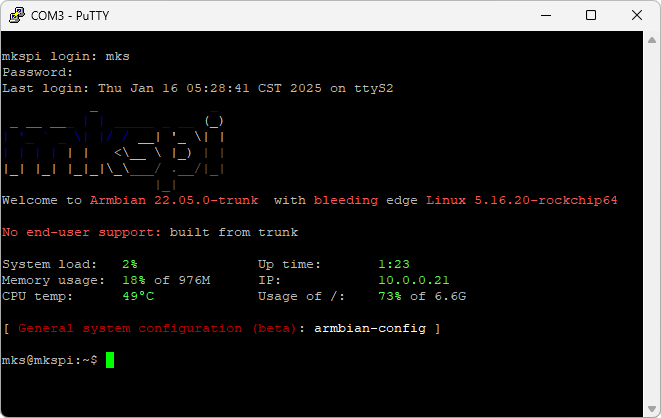
The terminal created by a serial conenction can be used in an almost identical fashion to the terminal created by an SSH connection.
- Determine the correct COM port
- Type device manager into the Windows Search Bar and select Device Manager from the search results

- In the Device Manager window that opens, expand the Ports (COM & LPT) section, if present
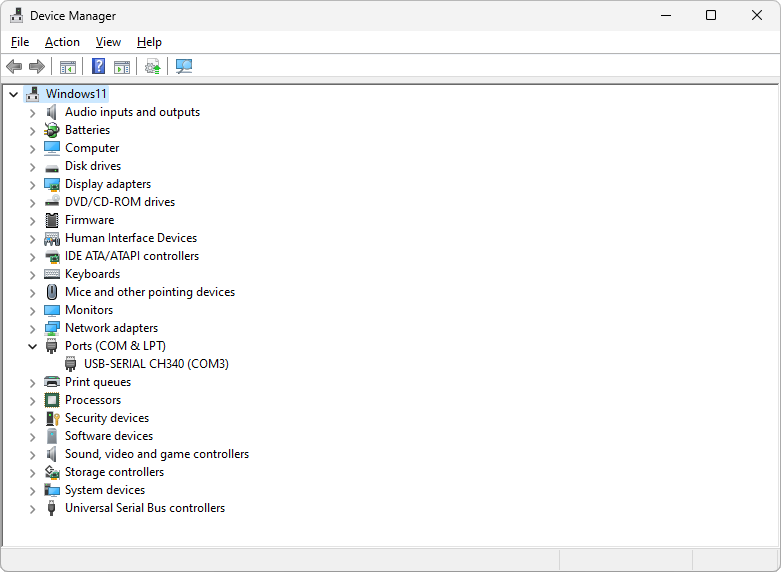
- Connect the printer to the computer using a USB-C cable
- Record the COM port listed in the new entry that appeared in the Ports (COM & LPT) section (COM3 in the image above)
- Close the Device Manager window
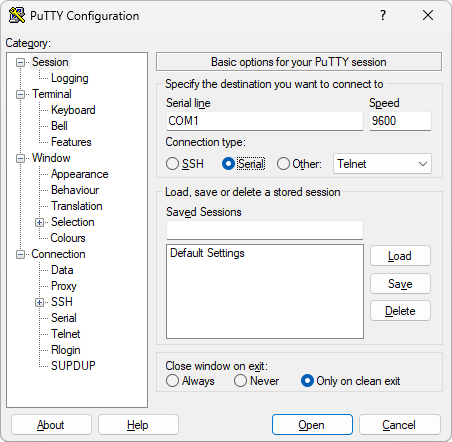
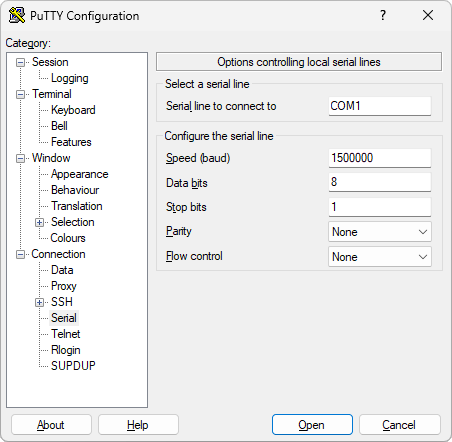
- Download the 64-bit x86 putty.exe executable (from the Alternative binary files section of https://www.chiark.greenend.org.uk/~sgtatham/putty/latest.html


 and select


 and select
  and select


